Note: I've tried to make sure this website can be used with JS disabled, but some of the articles use MathJax to display math formulas. Those formulas will sadly be displayed as LaTeX code if your browser has JavaScript disabled.
This article explains how I did the lighting for a game I’m working on. Here’s a quick and dirty video to give you a rough idea of how it looks in practice:
So, how does it work?
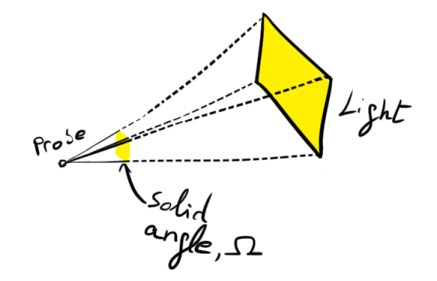
In a 3D space, if you look at an area light, it will cover a certain “solid angle” around you. That is, a certain portion of the sphere around you will be covered by that light source.
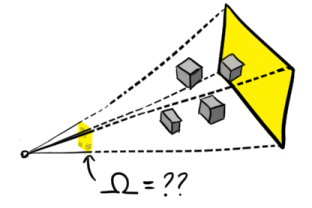
If that is all you have, it’s a pretty simple thing. However, if you have occluders that partially cover your view of the light source, the shape of that solid angle becomes more tricky to calculate. You’d have to calculate the joint projected shape of all occluders and subtract that from the light source’s… quite some work.
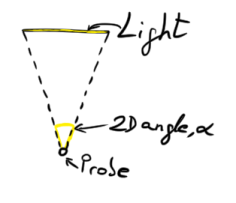
In 2D, however, this can be quite simpler. For starters, the angle is now a one-dimensional concept which is pretty easy to calculate.
As for the occluders, we can assume they’ll either:

And there’s also a tricky case where an occluder only blocks the middle part of the light, leaving both left and right ends unblocked. However, we can avoid it by mandating that all occluders must have a cross-section bigger than the light source. This way, our angles will never have disjoint parts after we occlude any part of them.
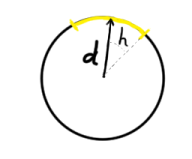
An easy way to work with those angles is to store the central direction and a symmetric half-angle (h) spreading on both sides of that direction:
Now, to convert an angle to an actual lighting value, we just use the h value to derive a value from the covered angle. In this case I decided to ditch math and go with old-fashioned trial and error, until I found that sqrt(h/Pi) gives me a pretty nice gradient which looks realistic enough for my purposes!
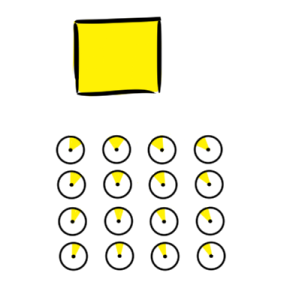
At this point, we can get the incoming lighting from a 2D light source at a single point, so what’s left is to cover the world with a grid of light probes which will sample the lights around them:
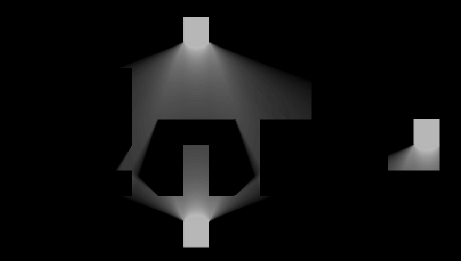
Then convert them to a lightmap by painting them into a texture:
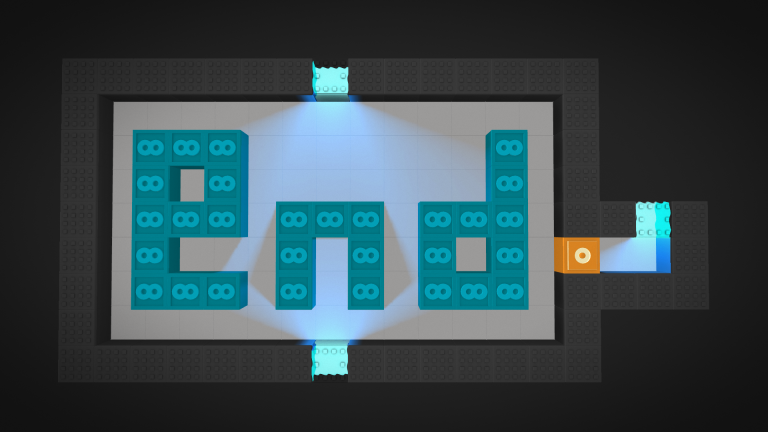
And finally use that lightmap to paint the actual scene:
So, was it worth it?
Visually, it definitely is. The penumbras you get with this method are gorgeous, and it gives the scene a really nice mood.
On the performance side of things, however, I’ve had to do some pretty serious optimization work to get it to run at 60fps. Except for the final two stages, everything else is done on the CPU. And even though I’ve manually coded most of the algorithm with SSE and parallelized it to several threads, it can still hurt performance if you don’t have a pretty powerful CPU. Oh, and it’s definitely not battery-friendly!
As future work, it shouldn’t be hard to port this system to run on GPU compute. This being an “embarrasingly parallel” problem it should run really fast there.
So, let’s get back to work!